The Environment
Creating Your Environment
For this workshop, you will need to setup and configure your environment as below:
- Spin AWS Cloud9, leveraging CloudFormation to create source repositories and foundation infrastructure
- Run a few custom scripts.
This will build the required infrastructure and pre-configured pipelines required for this workshop so that you can focus on the learning without worrying about the peripherals.
Deploy & Launch AWS Cloud9
There are several ways you can provision AWS Cloud9, however, for this workshop, we will use AWS Management Console to create our environment.
Go to Cloud9 service from AWS Management Console and -
- Click on Create Environment.
- Enter Name and Description and Click on Next Steps.
- In the Configure Settings section, leave the default values as it is and click on Next Steps.
- Review and click on Create environment.
INFO: The creation of Cloud9 environment can take 1-2 minutes, depending on the region you are operating from.
You should see the screen as shown below:

Your Cloud9 environment is ready.
Create the source repositories
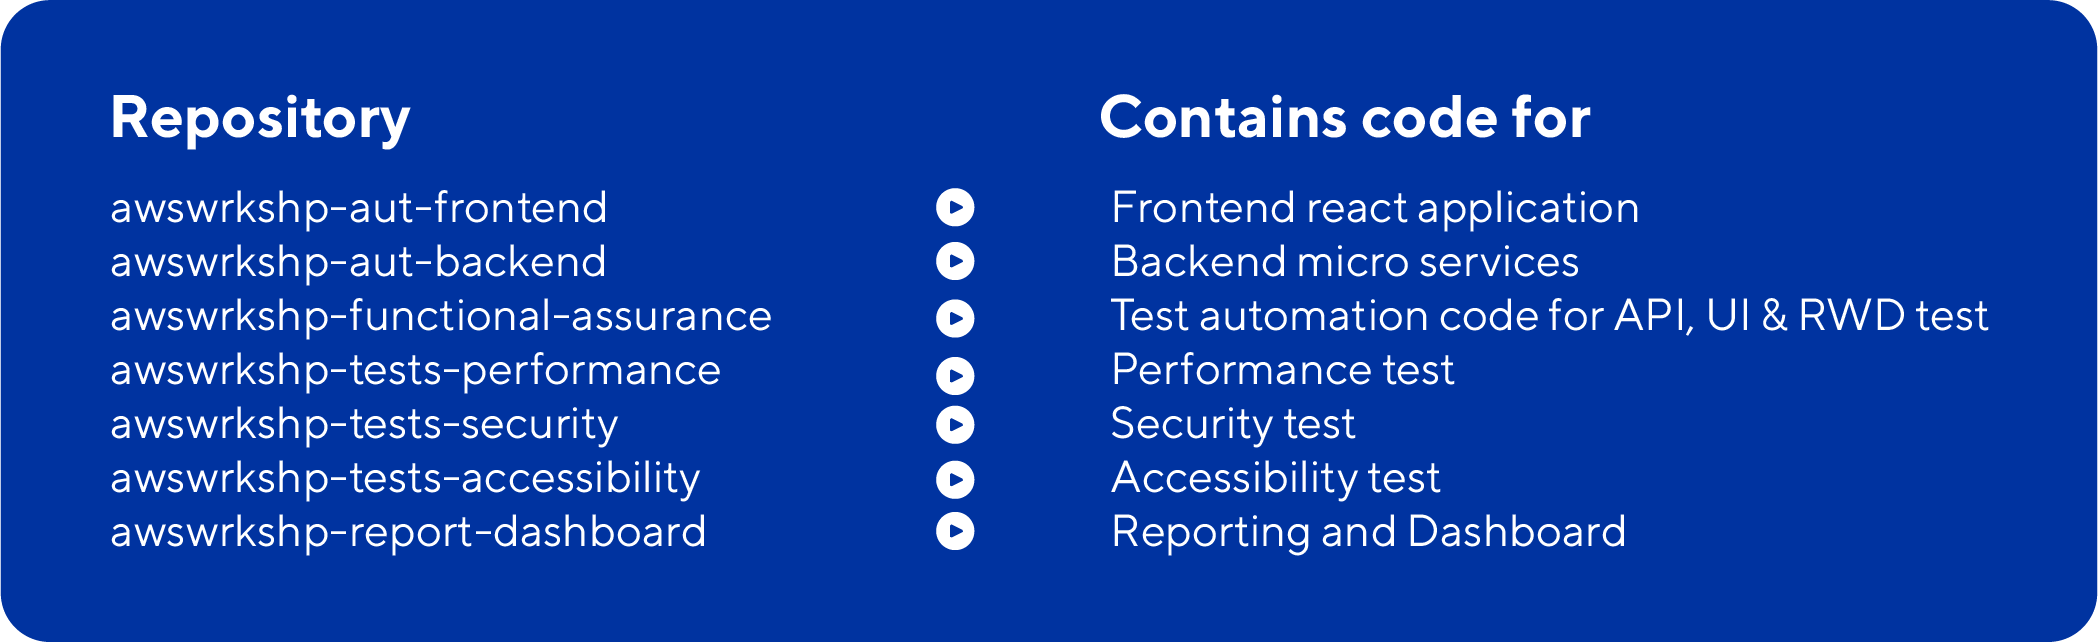
Now, we need seven repositories for the essential code base required for this workshop.
To create these repositories, run the following commands in Cloud9’s terminal:
aws cloudformation create-stack --stack-name CreateRepositories --template-url https://aws-wrkshp-artifacts.s3-eu-west-1.amazonaws.com/awsworkshop_infrastructure_artefacts/awsworkshop_create_repositories.jsonThis step takes approximately 30 seconds, after which, you should see the message as shown below:

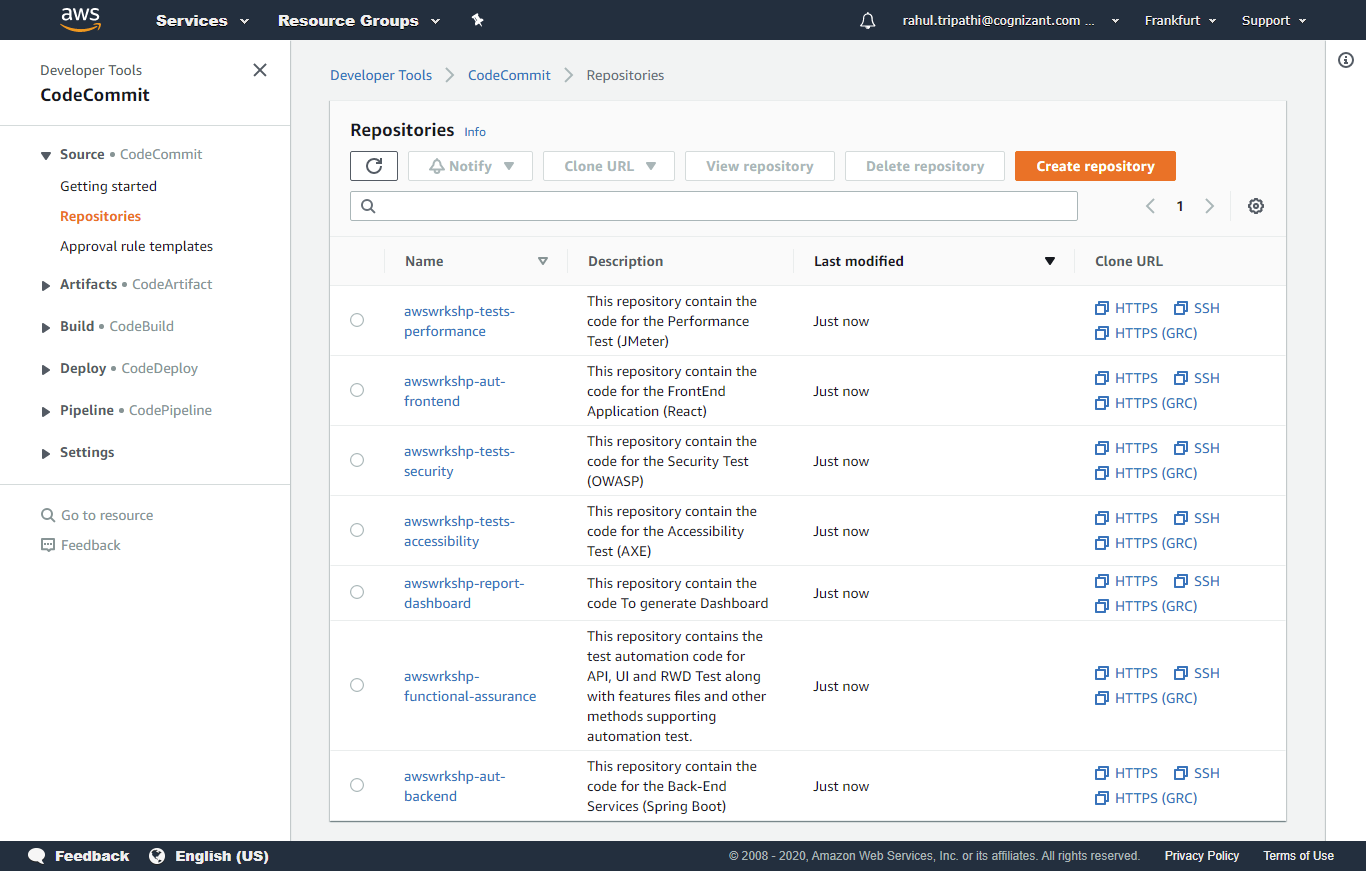
To verify the repositories, go to CodeCommit in AWS Console where they should reflect as shown below:
NOTE – At this point, all the repositories are blank. In the next step, we are going to push the code to these repositories. Refer screenshot as shown below:
Pushing the code to source repositories
Run the following 3 commands in Cloud9’s terminal in sequence:
wget https://aws-wrkshp-artifacts.s3-eu-west-1.amazonaws.com/awsworkshop_infrastructure_artefacts/pull_push_repos.shINFO: This complete step takes approximately 1 minute and if successful, you should see the following relevant messages for each command as shown below:

chmod +x ./pull_push_repos.sh./pull_push_repos.sh
At this point, you should have all the necessary code repositories with the required code base for this workshop. You can refer the README.md file of each repository to get more information on what the repository contains.
Setup Foundation Infrastructure
Now, you are ready to deploy the infrastructure that will be leveraged during this workshop by creating and setting up services such as VPC, Subnets, Elastic IPs, Amazon EC2, Security groups, S3 Buckets, secrets in AWS Secrets Manager and Amazon ECR services.
Copy and paste the following command into Cloud9’s terminal to create a foundation stack named -‘CreateFoundationStack’.
aws cloudformation create-stack --stack-name CreateFoundationStack --template-url https://aws-wrkshp-artifacts.s3-eu-west-1.amazonaws.com/awsworkshop_infrastructure_artefacts/awsworkshop_create_foundation_stack.json --capabilities CAPABILITY_NAMED_IAM 
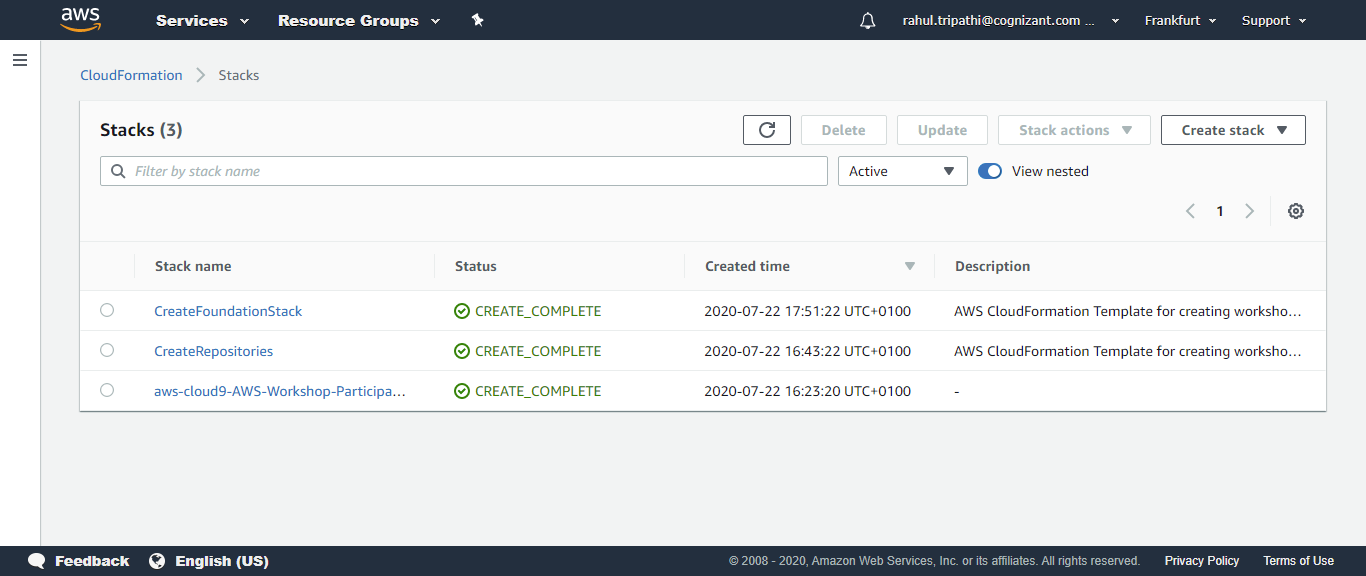
Go to the CloudFormation console and check the status of your foundation stack creation. It should be “CREATE_IN_PROGRESS” .
INFO: This step takes approximately 4 minutes and if successful, you can see the status of STACK as “CREATE_COMPLETE” .
Please navigate to below path in AWS Secrets Manager and you can see the details of the infrastructure created. Refer screenshot as shown below:
AWS Secrets Manager -> wrkshpSecrets -> Retrieve secret value
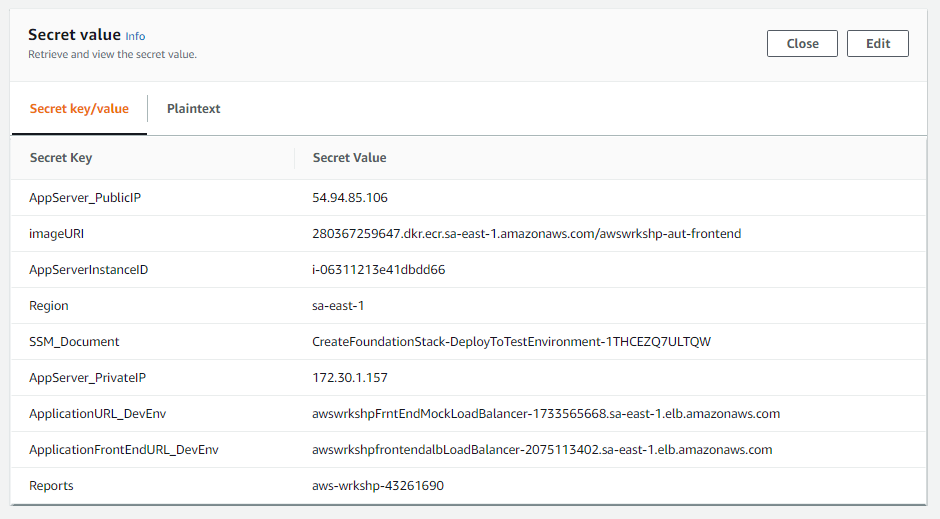
Please verify other services as well e.g. S3 Bucket, Secrets in AWS Secrets Manager. All the necessary details are added in AWS Secrets Manager as Secrets, so that these values can be utilized throughout the various components that you will build as the part of this workshop.
As a part of this setup, you have also installed SONARQube and a customized reporting dashboard. Both are required to check the status and progress of your testing.
We recommend you keep these open in your browser throughout the workshop:
- Access SONARQube dashboard:
http://<AppServer_PublicIP>:9000 - Access Reporting dashboard:
http://<AppServer_PublicIP >:3337
Replace the actual IPs from your Secrets Manager in these links (*) to access the dashboards
Well done! Your environment is now ready to go.
Let’s kick start the workshop and delve deeper into the what, why and how of ‘Test Automation in DevOps’.